P2459 Code: Understanding, DIY Solutions, And Repair Costs
OBD-II code P2459 is like a hidden message that your car wants to share with you. When your car’s sensors detect something’s not right, they use this code to let you know.
In this article, we’re going to uncover the mystery behind P2459. We’ll find out what it’s trying to tell us, why it appears, and most importantly, how we can solve it. So whether you’re a car enthusiast or just curious about car secrets, understanding P2459 will help you take better care of your vehicle.
Let’s get started!
P2459 Code: A Quick Overview
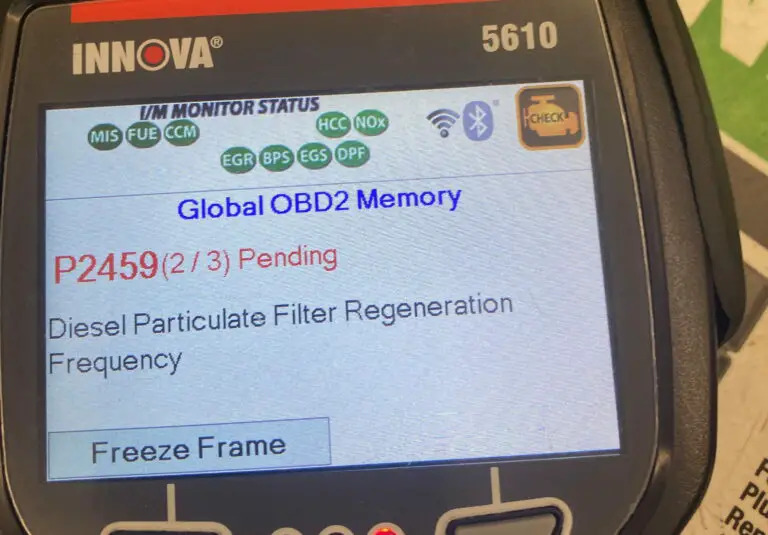
Check out the summary of the P2459 code provided below!
- Definition: Diesel Particulate Filter Regeneration Frequency
- Severity: Medium
- DIY Skill Level: Intermediate
- Continue To Drive?: Yes (with Limp mode)
- Estimated Repair Cost: $50 – $500
What Does The P2459 Code Mean?
The P2459 Diagnostic Trouble Code (DTC), labeled as “Diesel Particulate Filter Regeneration Frequency,” is a generic code specifically relevant to vehicles equipped with diesel engines. When this code is triggered, it signifies that the powertrain control module (PCM) has identified issues related to the diesel particulate filter (DPF) regeneration process.
The diesel particulate filter is a crucial component in controlling the emissions produced by diesel engines. Its primary function is to capture and remove up to 90% of the soot particles present in the exhaust gases, thus reducing harmful emissions. The DPF needs to undergo a periodic regeneration process to burn off the accumulated soot and maintain its effectiveness.
(Credit: Cumminsforum.com)
The PCM monitors the DPF regeneration process and exhaust pressure to ensure optimal performance. It will trigger the P2459 code under two specific circumstances:
- First, if the exhaust pressure fails to reach the required level
- Second, if the passive regeneration process (typically in a passive DPF system) does not adhere to the programmed frequency.
As I mentioned above, the DTC P2459 is exclusive to diesel-powered vehicles, encompassing both passenger cars and trucks that utilize diesel engines. Models from various manufacturers can experience this issue, including brands such as Ford, Chevrolet, Dodge, and more. There are some engines familiar with this code, including Duramax engines or 6.7 Cummins, etc.
How Severe Is The P2459 Code?
The severity of the P2459 code is considered moderate. While the code itself doesn’t indicate an immediate safety threat, it signifies a malfunction in the DPF regeneration process.
So can you still drive with the P2459? – The answer is Yes – However, it’s important to note that when this code is triggered, your vehicle might go into limp mode. In this mode, the engine’s power and performance might be limited to prevent further damage.
While you can drive your vehicle in this condition for short distances, it’s not a recommended long-term solution. In this case, it’s necessary to have the issue diagnosed by a qualified mechanic.
What Are The Symptoms Of The P2459 Code On Diesel Vehicles?
The presence of DTC P2459 can manifest through several noticeable symptoms, including:
- Illuminated warning lights ON (MIL and/or DPF light)
- Vehicle stuck in reduced performance mode (limp mode)
- Impaired acceleration
- Engine-related issues
What Causes The P2459 Code?
There are multiple factors can trigger the P2459 code, such as:
- Malfunctioning DPF pressure sensor
- Restricted DPF or exhaust system
- Accumulated soot within the DPF
- Electrical circuit problems
- Faulty fuel system
- Damaged diesel oxidation catalyst (DOC)/DPF filter
- Air leaks
- Bad fuel filters
- PCM-related concerns
Read more: Ford OBD2 Codes List for FREE Download
How To Diagnose And Fix The P2459 Code On Your Vehicles?
When faced with Diagnostic Trouble Code (DTC) P2459, it’s important to follow a systematic approach for diagnosis and repair. Below are the essential tools and parts, a step-by-step procedure, and an estimation of repair costs to assist in resolving the issue.
Essential Tools And Parts
To diagnose and repair the P145C code effectively, ensure you have the following tools and parts at hand:
- OBD-II scanner
- Digital multimeter
- DPF pressure sensor
- DPF cleaning kit (if necessary)
- Replacement parts based on diagnosis
Step-by-Step Procedure
1. Check The DPF Pressure Sensor
- Locate the DPF pressure sensor (consult your vehicle’s repair manual if needed).
- Disconnect the electrical connector from the sensor.
- Use a digital multimeter to measure the sensor’s resistance and compare it to the specifications in the repair manual.
- If the resistance is out of range, replace the DPF pressure sensor with a new one.
2. Visually Inspect The Restricted DPF Or Exhaust System
- Inspect the exhaust system and DPF for visible blockages or damage.
- If no visible issues are found, perform a back pressure test to measure exhaust flow.
- Compare the measured back pressure to the manufacturer’s specifications.
- If the back pressure is too high, consider cleaning or replacing the DPF or exhaust components as needed.
3. Check The Accumulation Of Soot Within The DPF
- Perform a forced DPF regeneration as recommended in your vehicle’s manual. This may involve driving at a certain speed or RPM range for a specified duration.
- If forced regeneration doesn’t resolve the issue, consider using a DPF cleaning additive or a professional DPF cleaning service.
4. Examine Wiring Harnesses And Connectors
- Check all wiring and connectors related to the DPF pressure sensor and other relevant components.
- Repair any damaged wires or connectors and ensure proper connections.
5. Inspect The Fuel System For Clogging Or Damage
- Inspect the fuel system components, including fuel filters, fuel lines, and injectors.
- Replace any faulty or clogged fuel filters and ensure proper fuel flow to the engine.
6. Examine The DOC Or DPF Filters
- Inspect the DOC/DPF filter for physical damage or cracks.
- If damage is evident, replace the damaged component with a new one.
7. Check For Any Air Leaks In The Exhaust System
- Carefully inspect the entire exhaust system for any leaks or gaps.
- Use exhaust sealant or gaskets to seal any identified leaks.
8. Test The Performance Of The PCM
- Perform a thorough scan of the PCM using a diagnostic tool to identify any related faults.
- If PCM-related issues are found, consult the vehicle’s repair manual or seek professional assistance for appropriate diagnosis and repair.
9. Clear The Codes And Test Drive
After conducting all procedures, clear the codes by using an OBD scanner. Perform a test drive to see if the codes come back or not.
Note: It’s important to consult your vehicle’s repair manual or seek professional assistance if you’re unsure about any step in the process.
Read more: Honda OBD2 Codes List [Generic + Manufacturer-specific]
DIY Repair Level And Estimated Costs
When it comes to addressing Code P2459 and related issues, there are steps you can take on your own to diagnose and potentially fix the problem. However, the level of DIY repair varies based on your mechanical skills, tools, and comfort level. If you’re experienced and confident, you might successfully complete tasks like inspecting for visible blockages, checking wiring, or performing basic checks. For more complex tasks, it’s advisable to consult a professional mechanic.
Here’s an estimated cost breakdown for main repair tasks:
| Repair Task | Estimated Cost |
| DPF pressure sensor replacement | $50 – $150 |
| Exhaust system inspection and repair | $50 – $300 |
| Professional DPF cleaning service | $150 – $500 |
| Diesel Oxidation Catalyst (DOC)/DPF replacement | $200 – $800 |
| PCM software update or replacement | $100 – $1,500 |
Keep in mind that these costs are approximate and can vary based on vehicle make, model, and location. If you’re uncertain or encounter challenges during the repair process, don’t hesitate to seek help from a qualified mechanic to ensure the job is done correctly and safely.
P2459 Infographic

Final Thoughts
Facing the P2459 code might seem daunting, but armed with knowledge and guidance, you’re well-equipped to address the issue. Remember, proper diagnosis and timely repairs are essential for maintaining optimal vehicle performance and minimizing emissions. Whether you’re a seasoned DIY enthusiast or prefer leaving it to the experts, taking action now ensures a smoother ride ahead.
If you found this guide helpful, share it with fellow vehicle owners who might benefit. Feel free to leave your comments and questions below – we’re here to assist you on your automotive journey. Safe travels and happy troubleshooting!
Find more codes by using our OBD lookup tool!
Reference Sources
- JustAnswer, P2459 Diagnostic Procedure [PDF document]
- Wikipedia, Diesel particulate filter
- Mr Tyre, Limp Mode Causes and What to Do About It. Mr Tyre